You bring your bishop out on move two, poke their knight before they finish saying 'opening prep', and steer every game onto your board. You play the poke, both replies, and a full game against an opponent whose knight jumps at everything.
Start here
0
Chapter 1: The Sidestep
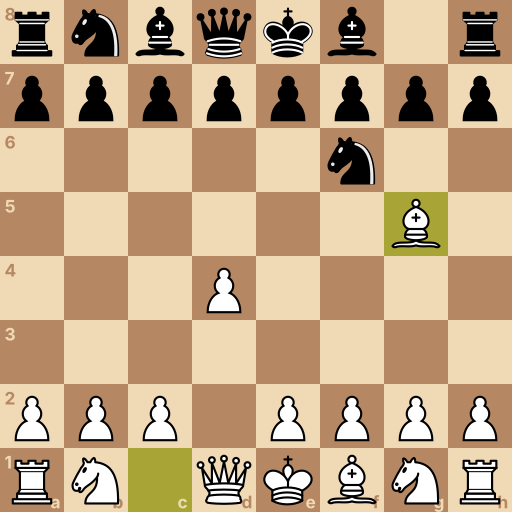
Main line: 1.d4 Nf6 2.Bg5
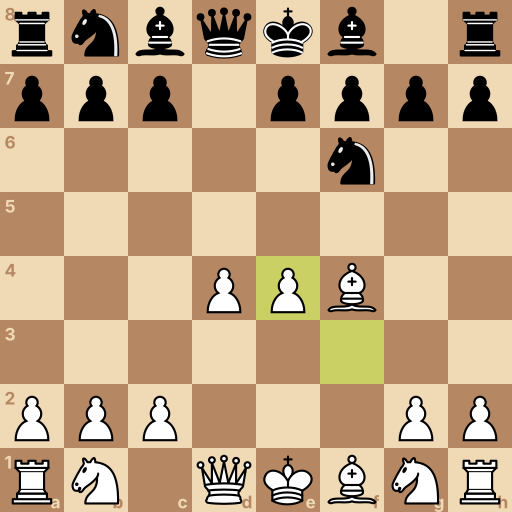
Position after 1.d4 Nf6 2.Bg5. Black to move.
These four squares are the middle of the board. A piece standing near them reaches everywhere; a piece stuck on the edge reaches half as far.
White moves first. This opening claims the middle on move one — and leaves every well-studied path on move two.
Your move: Push your queen's pawn two squares, to d4, and take your first middle square.
1.d4 The pawn in front of your queen — two steps to d4 grabs the middle.
Your move: Their knight comes to f6 — the most common move in chess. Now sidestep everything they prepared: bishop to g5, poking that knight immediately.
2.Bg5 The dark bishop jumps to g5 and pokes the f6 knight on move two.
Question: What does this early bishop poke actually threaten?
Answer: To take on f6 and double their pawns — and they must think about it every move. Picture their pawns after your bishop takes the knight. Bishop takes knight, and whichever pawn recaptures, their kingside structure bends. Sometimes you take, sometimes you just hold the threat — either way, they answer your question instead of playing their preparation. That is the Trompowsky.
This is the Trompowsky Attack. Two moves in, and the game is on your board, not theirs.
Their sharpest answer jumps the knight at your bishop. The next chapter turns that jump into your big middle.
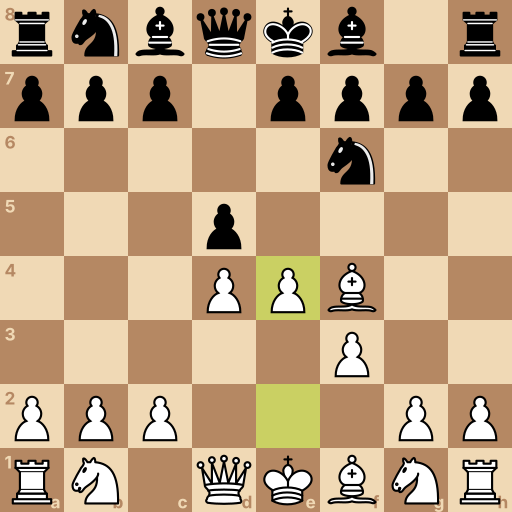
Position after 1.d4 Nf6 2.Bg5 Ne4 3.Bf4 d5 4.f3 Nf6 5.e4. Black to move.
There is the jump — their knight lands on e4 and pokes your bishop right back.
Stay calm. The knight stands on a square no pawn of theirs guards, and you are about to make it regret the trip.
Your move: Step the bishop back to f4 — safe, still active, and now the knight must explain itself.
3.Bf4 The bishop steps to f4 — out of reach, still on a good diagonal.
Your move: They prop the knight with d5. Now ask it to leave: one step with your f-pawn, to f3.
4.f3 One step with the f-pawn — it attacks the visiting knight.
Your move: The knight runs home to f6 — its trip is over. Collect the payment: push e4 and take the whole middle by force.
5.e4 The e-pawn, two steps — the knight's wasted trip paid for your big middle.
Question: Their knight went out and came back; you have pawns on d4 and e4. What paid for that middle?
Answer: Their two wasted knight moves — time bought your pawns their squares. Count their useful moves so far against yours. The knight's round trip cost two moves and achieved nothing; your bishop step and pawn moves all stayed on the board. Time is a currency — they spent theirs on travel, you spent yours on the middle.
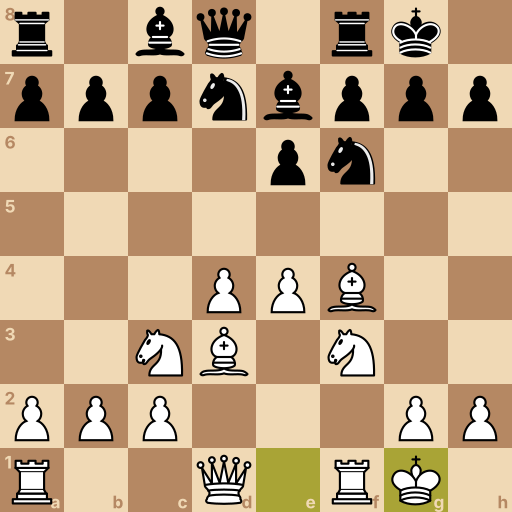
Position after 1.d4 Nf6 2.Bg5 Ne4 3.Bf4 d5 4.f3 Nf6 5.e4 dxe4 6.fxe4 e6 7.Nc3 Be7 8.Bd3 O-O 9.Nf3 Nbd7 10.O-O. Black to move.
They trade in the middle. Take back with the f-pawn — and notice what that opens: the f-file, straight ahead of where your rook will castle.
From here, develop with purpose and let the big middle carry you.
Your move: Take back with the f-pawn.
6.fxe4 The f-pawn takes back — the middle holds and the f-file opens.
Your move: They build a wall with e6. Guard your middle: knight to c3.
7.Nc3 The queenside knight guards e4 from c3.
Your move: They develop the bishop. Yours goes to d3 — guarding e4 and pointing at their king's corner.
8.Bd3 The light bishop takes d3 — one eye on e4, one on h7.
Your move: They castle. Bring your kingside knight to f3 — the square your pawn vacated when it captured.
9.Nf3 The knight develops to f3 — the pawn that stood there already left.
Your move: They tuck a knight in. Castle — and your rook lands beside the half-open f-file, staring at f7.
10.O-O Two squares toward the corner — the rook lands by the open f-file.
Question: Big middle, bishop pair, rook on the f-file. Where does the game go from here?
Answer: Roll the middle forward — e5 comes with the rook and bishops behind it. Big pawn middles are for pushing at the right moment — look what stands behind e5. When e5 lands, the knight gets kicked, the d3 bishop's diagonal opens, and the f-file rook joins the same attack. The knight jump gave you all of this — cash it in the middlegame.
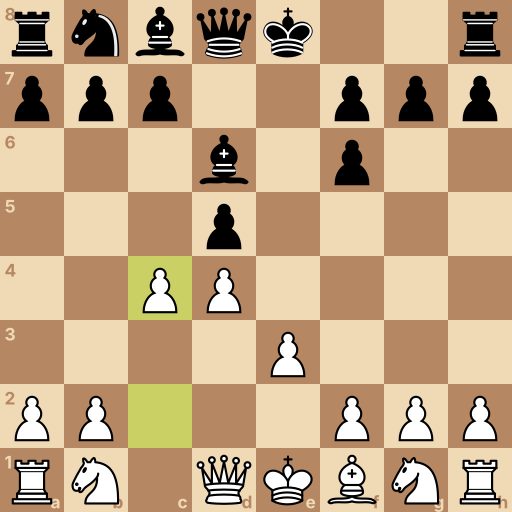
Position after 1.d4 Nf6 2.Bg5 d5 3.Bxf6 exf6 4.e3 Bd6 5.c4. Black to move.
The calm answer: they shore up the middle and let your bishop do its worst.
So do it — take the knight, and leave their pawns bent for the rest of the game.
Your move: Take the f6 knight.
3.Bxf6 Bishop takes knight — the threat becomes the deed.
Your move: They take back with the e-pawn, and their pawns now stand doubled on the f-file. Build quietly: one step to e3.
4.e3 One step with the e-pawn — build calmly against the bent structure.
Your move: They develop the bishop. Push c4 and lean on their d5 pawn — the start of the long, comfortable squeeze.
5.c4 The c-pawn, two steps — pressure on d5 begins.
Question: You gave up the bishop pair to bend their pawns. What is your long-term plan?
Answer: Trade pieces toward an endgame where the doubled pawns can't defend themselves. Doubled pawns hurt most when the boards empties — think far ahead. Every trade brings the game closer to an endgame where their f-pawns are two targets that can't help each other. Develop, castle, exchange when offered, and let the structure do the winning. Patience is the price; the endgame is the prize.
Final challenge: The Jumper (800 Elo)
The opponent says: Poke my knight? It jumps first and asks questions never.
Your tasks in the game, in order:
Step the bishop back to f4 — safe and still working.
Ask the knight to leave — one step to f3.
It ran home — take the whole middle with e4.
They trade — take back with the f-pawn.
Position after 1.d4 Nf6 2.Bg5 Ne4 3.Bf4 d5 4.f3 Nf6 5.e4 dxe4 6.fxe4. Black to move.
History of the Trompowsky Attack
The Trompowsky Attack begins 1.d4 Nf6 2.Bg5 and is classified under ECO A45. It is named after Brazilian champion Octavio Trompowsky, who played the system regularly in the 1930s and 1940s. His use helped establish it as an independent alternative to the main Indian defenses after 1.d4 Nf6.
Main ideas for White
White develops the c1 bishop immediately, pins or threatens to exchange the f6 knight, and prepares control of e4. After 2...Ne4, the line 3.Bf4 d5 4.f3 Nf6 5.e4 keeps the bishop active while challenging the knight and building a pawn center. Against quieter play with 2...d5, White can exchange on f6 and pressure d5 with the c-pawn. Black usually seeks quick central counterplay by moving the knight to e4 or placing pawns on d5, e6, and c5.
Typical plans
After 2...Ne4 3.Bf4 d5 4.f3 Nf6 5.e4, White often builds a broad center and may advance the e-pawn again to gain space. If the f-pawn recaptures on e4, the half-open f-file gives the rook activity after White castles kingside, while the light bishop can target h7 from d3. After an exchange on f6, White instead attacks d5 with the c-pawn and can favor exchanges that expose the doubled f-pawns. Black plays against the center with timely pawn breaks.
Common mistakes
Moving the bishop repeatedly without gaining central space wastes the point of 2.Bg5; meet 2...Ne4 with 3.Bf4 and prepare the central pawn advances.
Advancing the f-pawn without checking the central response can weaken the king; use it when the knight on e4 can be driven back.
Exchanging on f6 automatically can surrender the bishop pair for little; take there when doubled pawns or central control justify the trade.
Related openings
Queen's Gambit1.d4 d5 2.c4. Offer the c-pawn and take the middle either way.
London System1.d4 d5 2.Bf4. The same solid house nearly every game.
Catalan Opening1.d4 Nf6 2.c4 e6 3.g3 d5 4.Bg2. One bishop presses their queenside all game.
King's Indian Defense1.d4 Nf6 2.c4 g6. Let them build the middle, then strike it down.
Slav Defense1.d4 d5 2.c4 c6. Guard the middle and keep your bishop free.
Dutch Defense1.d4 f5. Claim e4 with a wing pawn and storm their king.
Grünfeld Defense1.d4 Nf6 2.c4 g6 3.Nc3 d5. Hand them the big middle, then hammer it.
Nimzo-Indian Defense1.d4 Nf6 2.c4 e6 3.Nc3 Bb4. Pin the knight and own e4 without a pawn.