You answer 1.d4 with a wing pawn that claims e4 for the whole game, build a stone wall behind it, and send your pieces at their king. You play the wall, both replies, and a full game against an opponent that baits your f-pawn with gambits.
Start here
0
Chapter 1: The Wing Claim
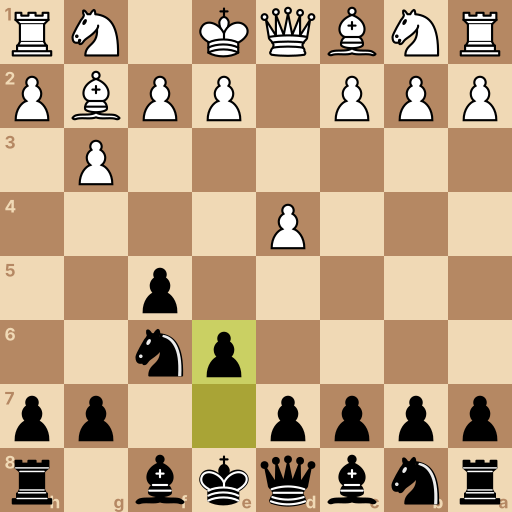
Main line: 1.d4 f5 2.g3 Nf6 3.Bg2 e6
Position after 1.d4 f5 2.g3 Nf6 3.Bg2 e6. White to move.
These four squares are the middle of the board. A piece standing near them reaches everywhere; a piece stuck on the edge reaches half as far.
White moves first and takes a middle square with 1.d4. Most defenses answer in the middle. This one answers from the wing — and means it.
Your move: Push your f-pawn two squares, to f5. It plants a claim on e4 — the middle square their whole setup would love to use — and announces where this game will be fought: near their king.
1...f5 The pawn in front of your king's bishop — two steps to f5 claims e4.
Your move: They set up their bishop with g3. Bring your kingside knight to f6 — a second claim on e4.
2...Nf6 The knight in front of your rook — one jump to f6 adds a claim on e4.
Your move: Their bishop takes the corner. One step with your e-pawn, to e6 — it opens your own bishop and starts the wall.
3...e6 One step with the e-pawn — it frees your bishop and builds the wall.
Question: Why open with the f-pawn instead of a middle pawn?
Answer: It claims a middle square and points the game at their king. Look at what f5 controls, and which side of the board it leans toward. f5 grips e4 like a middle pawn would — but it also tilts the whole game toward their king's side, where your attack will come. One move, two promises. That is the Dutch.
This is the Dutch Defense. e4 is claimed twice, and your pieces have their doors open.
The next chapter builds the stone wall — four pawns that make your claim permanent.
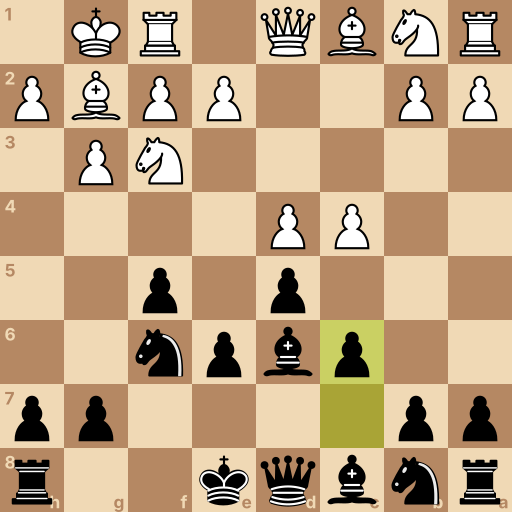
Position after 1.d4 f5 2.g3 Nf6 3.Bg2 e6 4.Nf3 d5 5.O-O Bd6 6.c4 c6. White to move.
Now the pawns take formation: d5 and c6 join f5 and e6, and the four of them make a wall.
The wall has one job — no white piece ever sits on e4. With that square dead, their position has no way forward in the middle.
Your move: Push your d-pawn two squares, to d5. The third stone — e4 now belongs to you for the rest of the game.
4...d5 The d-pawn, two steps — it locks the middle and seals your claim on e4.
Your move: They castle. Your dark bishop has one great square: d6, where it aims over the wall straight at their king's corner.
5...Bd6 The dark bishop steps to d6 and points at their castled king.
Your move: They poke at your wall with c4. The last stone: one step to c6 guards d5, and the wall is finished.
6...c6 One step with the c-pawn — it guards d5 and completes the wall.
Question: Four pawns in a diagonal wall. What is the wall actually for?
Answer: It kills e4, so you can attack their king without a counter in the middle. An attack on the wing only fails when the middle opens — check whether theirs can. The classic answer to a wing attack is a strike in the middle. Your wall makes that strike impossible — e4 is dead and d5 is sealed. So your coming attack runs with nothing to interrupt it.
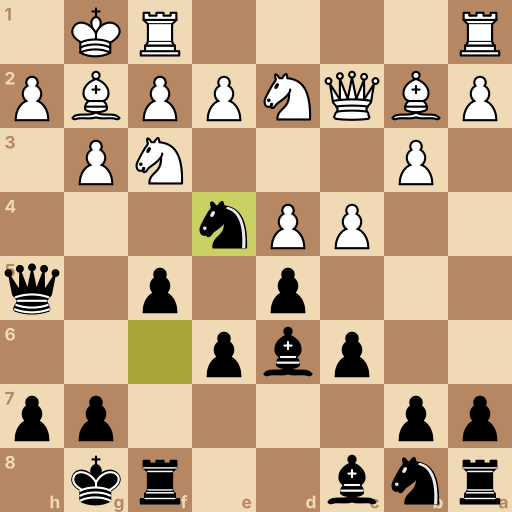
Position after 1.d4 f5 2.g3 Nf6 3.Bg2 e6 4.Nf3 d5 5.O-O Bd6 6.c4 c6 7.Qc2 O-O 8.b3 Qe8 9.Bb2 Qh5 10.Nbd2 Ne4. White to move.
The wall stands. Now the pieces climb over it, one by one, toward their king.
First your own king tucks in — then watch the queen take a road you may never have seen before.
Your move: Castle — two squares toward the corner. Your f-rook lands right behind the pawn that started everything.
7...O-O Two squares toward the corner — the rook jumps over by itself.
Your move: They build on the far side. Now the Dutch move: slide your queen one square, to e8. She is not retreating — she is catching the train to h5.
8...Qe8 The queen steps sideways to e8 — the first stop on her road to h5.
Your move: They keep building far from their king. Complete the swing: queen to h5, staring at the squares around their castle.
9...Qh5 The queen rides the rank to h5, right next to their king's corner.
Your move: They shuffle a knight. Land yours on the square the wall owns: e4. Guarded by two pawns, attacking, and impossible to evict with a pawn — the best knight on the board.
10...Ne4 The knight jumps to e4 — the square your wall was built to own.
Question: Queen on h5, knight on e4, bishop aimed at h2. What finishes the attack?
Answer: The f-pawn marches on — f4 pries their king's cover open. The pawn that opened the game still has one more job. f4 comes with the rook already behind it, and their king's pawn cover cracks. Queen, knight, bishop, rook, and the f-pawn all arrive at the same corner — and the wall keeps the middle shut while they do.
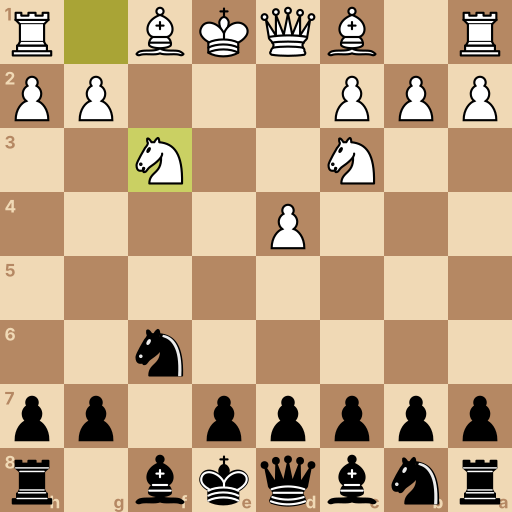
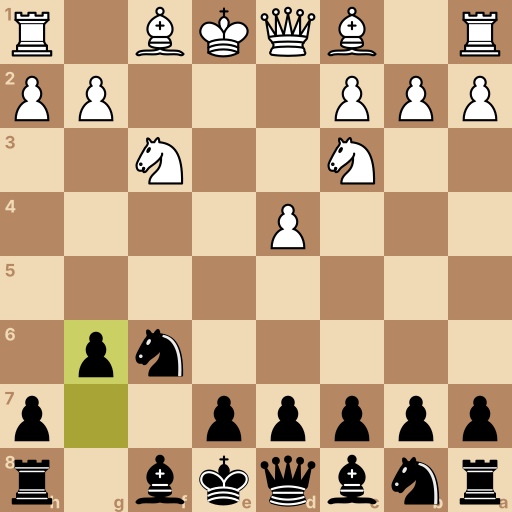
Position after 1.d4 f5 2.e4 fxe4 3.Nc3 Nf6 4.f3 exf3 5.Nxf3. Black to move.
The sharp try: they offer their king's pawn on move two, hoping to rip open the lines your f-pawn left behind.
You take it — and then you make the gambit pay full price.
Your move: Take the pawn with your f-pawn.
2...fxe4 Your f-pawn takes the offered pawn on e4.
Your move: Their knight comes out, eyeing your new pawn. Guard it — knight to f6.
3...Nf6 The knight in front of your rook — one jump to f6 guards e4.
Your move: They try to pry the pawn loose with f3. Take that one too — every trade leaves you a pawn up and them with open air in front of their king.
4...exf3 Your e4 pawn takes on f3 — keep the extra pawn, let them do the exposing.
Question: They took back and stand a pawn down with faster development. How do you play it?
Answer: Develop fast, castle, and keep the one pawn you took. One grabbed pawn is a win; a second one is usually the losing move. A gambit beats greed, not care. Take the one pawn, then match them move for move — g6, bishop, castle — and their attack runs out before your extra pawn does. Solid and one up beats flashy and even.
Final challenge: The Baiter (800 Elo)
The opponent says: Here's a free pawn. Go on, take it. I dare you.
Your tasks in the game, in order:
Take the bait — your f-pawn captures on e4.
Guard your new pawn — knight to f6.
They pry with f3 — take that pawn too.
Now the calm move: g6, and your bishop gets its corner.
Position after 1.d4 f5 2.e4 fxe4 3.Nc3 Nf6 4.f3 exf3 5.Nxf3 g6. White to move.
History of the Dutch Defense
The Dutch Defense begins 1.d4 f5 and occupies ECO codes A80 through A99. Its name is linked to Elias Stein, a Dutch master who recommended the defense in a chess book published in 1789. It became an established competitive opening during the nineteenth century, with the Stonewall, Classical, and Leningrad systems later forming its main branches.
Main ideas for Black
Black uses 1...f5 to control e4 and create kingside space without placing a pawn in the center. In the Stonewall setup, pawns on f5, e6, d5, and c6 restrict e4, while the f6 knight can occupy that square and the d6 bishop aims at h2. White usually fianchettos the g2 bishop, attacks the dark squares, and seeks queenside or central play before Black organizes a kingside attack.
Typical plans
The Stonewall produces a closed central chain in which Black plays for activity on the kingside and White often works on the queenside or against e5. Black may castle, swing the queen through e8 to h5, place a knight on e4, and advance the f-pawn to f4 to disturb the white king. The e5 and c5 pawn breaks can challenge the center, but each requires preparation because moving the f-pawn has already weakened the black king.
Common mistakes
Playing f5 without quick development can expose the king; bring out the knights, open the f8 bishop, and castle before attacking.
Building the Stonewall while leaving the c8 bishop without a plan creates a bad piece; reroute it through d7, b7, or a6.
Launching the f-pawn to f4 before the queen, bishop, knight, and rook are coordinated wastes time; complete the attacking setup before advancing again.
Related openings
King's Indian Defense1.d4 Nf6 2.c4 g6. Let them build the middle, then strike it down.
Slav Defense1.d4 d5 2.c4 c6. Guard the middle and keep your bishop free.
Grünfeld Defense1.d4 Nf6 2.c4 g6 3.Nc3 d5. Hand them the big middle, then hammer it.
Nimzo-Indian Defense1.d4 Nf6 2.c4 e6 3.Nc3 Bb4. Pin the knight and own e4 without a pawn.
Queen's Indian Defense1.d4 Nf6 2.c4 e6 3.Nf3 b6. Control e4 from the corner, at a distance.
Bogo-Indian Defense1.d4 Nf6 2.c4 e6 3.Nf3 Bb4+. A check on move three that develops for free.
Benoni Defense1.d4 Nf6 2.c4 c5 3.d5 e6. Lure the push, then march your majority.
Benko Gambit1.d4 Nf6 2.c4 c5 3.d5 b5. One pawn buys two open files, forever.