You meet the Queen's Gambit with a pawn guard, so your middle pawn never has to leave — and your bishop gets out before the wall goes up. You play the guard, both replies, and a full game against an opponent that goes hunting for the pawn your bishop left behind.
Start here
0
Chapter 1: The Guard
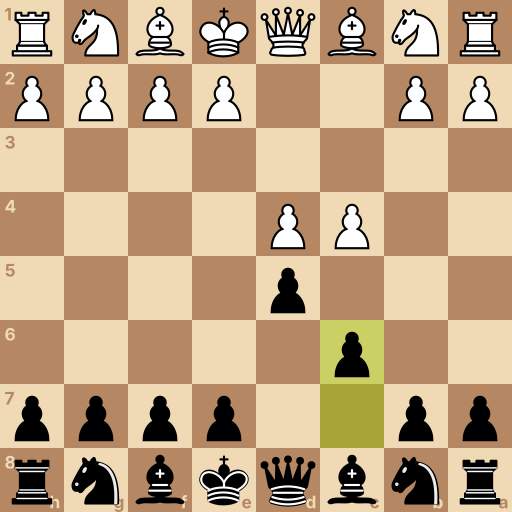
Main line: 1.d4 d5 2.c4 c6
Position after 1.d4 d5 2.c4 c6. White to move.
These four squares are the middle of the board. A piece standing near them reaches everywhere; a piece stuck on the edge reaches half as far.
White moves first and will claim one of them. This defense meets them in the middle — and then refuses to be pulled out of it.
Your move: They open with the queen's pawn. Push your own queen's pawn two squares, to d5, and meet them in the middle.
1...d5 The pawn in front of your queen — two steps to d5 meets theirs.
The Queen's Gambit — their c-pawn offers itself, hoping your middle pawn takes it and leaves the middle.
You will not take. You will guard.
Your move: One small step with your c-pawn, to c6. Now d5 is guarded by a pawn, and their gambit has nothing to bite on.
2...c6 One step with the c-pawn — it guards d5 so nothing has to leave the middle.
Question: Your e-pawn could guard d5 the same way. Why the c-pawn?
Answer: An e6 guard would wall in your own light bishop. Think about which of your bishops sits behind each pawn. Guard with the e-pawn and your c8 bishop is stuck behind its own wall for a long time. Guard with the c-pawn and the bishop's road out stays open — it leaves home first, and the wall goes up behind it. That one idea is the Slav.
This is the Slav Defense. The middle is guarded, nothing is loose, and your bishop is promised a way out.
The next chapter keeps that promise — pieces out, bishop before wall.
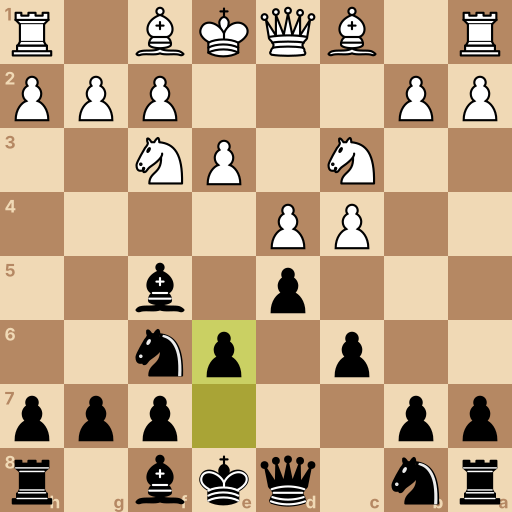
Position after 1.d4 d5 2.c4 c6 3.Nf3 Nf6 4.Nc3 Bf5 5.e3 e6. White to move.
Both sides bring knights out first — they just did, and yours comes next.
Then comes the move that makes the Slav the Slav: the bishop steps outside before the pawn wall closes behind it.
Your move: Bring your kingside knight to f6 — toward the middle, watching e4.
3...Nf6 The knight in front of your rook — one jump to f6, toward the middle.
Your move: Their other knight comes out. Now keep the promise: slide your bishop out to f5, onto the open diagonal, while the door is still open.
4...Bf5 The bishop beside your queen goes out to f5 — before any wall shuts it in.
Your move: They build their wall with e3 — and lock their own dark bishop behind it. Build yours with e6: your light bishop is already outside.
5...e6 One step with the e-pawn — your bishop is already out, so nothing gets shut in.
Question: Same wall on both sides — but yours went up second. What did the order buy?
Answer: Your bishop got out first — the same wall traps theirs. Find each side's bishop that wanted the f5 or f4 square. Move order is the whole trick: knight, bishop out, then the wall. Their dark bishop spends the game wishing e3 had waited. Yours watches the board from f5.
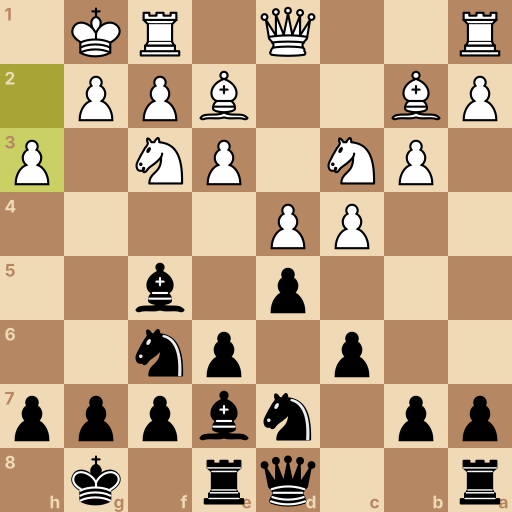
Position after 1.d4 d5 2.c4 c6 3.Nf3 Nf6 4.Nc3 Bf5 5.e3 e6 6.Be2 Nbd7 7.O-O Be7 8.b3 O-O 9.Bb2 Re8 10.h3. Black to move.
The clever part is done. What remains is honest work: knight, bishop, castle.
And while the pieces come out, one break gets aimed — the e5 push that opens the game your way later.
Your move: Bring your other knight to d7, tucked behind your pawns. It guards the middle and stands behind the e5 break you will play later.
6...Nbd7 The knight beside your rook goes to d7, tucked behind your pawns.
Your move: They castle. Your dark bishop steps to e7 — the last piece between your king and its corner.
7...Be7 The bishop on f8 steps to e7 and clears the runway for your king.
Your move: They set up on the far side. Castle — king two squares toward the corner, done.
8...O-O Two squares toward the corner — the rook jumps over by itself.
Your move: Their bishop settles into its corner. Slide your rook to e8 — right behind the e5 break to come.
9...Re8 The rook that castled steps to e8, behind the break you are aiming.
Question: Everything is placed and nothing is loose. Where does your play come from?
Answer: Time the e5 break in the middle. Your d7 knight, your e6 pawn, and your e8 rook all look at the same square. The e-pawn steps to e5 with knight and rook behind it, the middle opens, and your pieces already stand on their best squares. Until that moment you are solid everywhere — the Slav's favorite state.
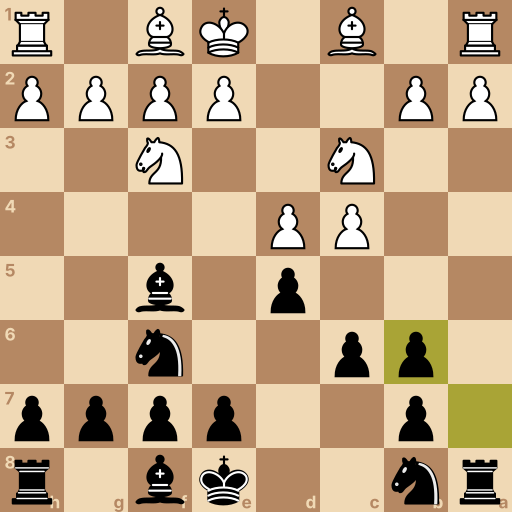
Position after 1.d4 d5 2.c4 c6 3.Nf3 Nf6 4.Nc3 Bf5 5.Qb3 Qb6 6.Qxb6 axb6. White to move.
One try you must know: their queen swings to b3 and pokes at b7 — the pawn your bishop left behind — while leaning on d5 too.
It looks scary. It has a calm answer.
Your move: Meet her face to face: your queen to b6. She guards b7 and stares their queen down — trade if you dare.
5...Qb6 Your queen to b6 — face to face down the file, and b7 is covered.
Your move: They trade. Take back with your a-pawn, toward the middle — and look: your rook's file just opened all by itself.
6...axb6 The a-pawn takes back toward the middle and opens the rook's file.
Question: Queens off. What did their poke actually get them?
Answer: Nothing — and your rook got an open file for free. Compare the board to before the poke: what changed for them, and for you? b7 held, the queens left the board, and the trade handed your corner rook an open file. Pokes that win nothing just help you develop — the Slav thrives on that.
Final challenge: The Pickpocket (800 Elo)
The opponent says: That b7 pawn looks unattended. I'll be helping myself.
Your tasks in the game, in order:
Bring your kingside knight to f6.
Keep the promise — bishop out to f5, before the wall.
The queen pokes b7 — meet her face to face on b6.
They trade — take back with the a-pawn and open your rook's file.
Position after 1.d4 d5 2.c4 c6 3.Nf3 Nf6 4.Nc3 Bf5 5.Qb3 Qb6 6.Qxb6 axb6. White to move.
History of the Slav Defense
The Slav Defense begins 1.d4 d5 2.c4 c6 and occupies ECO codes D10 through D19. Unlike 2...e6, the move 2...c6 supports d5 without blocking the c8 bishop. Its name reflects the many Slavic masters who developed its theory, and it became an established tournament defense during the 1920s.
Main ideas for Black
Black uses the c6 pawn to reinforce d5 while preserving the c8 bishop, then develops the g8 knight to f6 and often the bishop to f5 before closing the light-square diagonal with e6. The f6 knight controls e4, while the d7 knight and e8 rook can support an eventual e5 break. White usually attacks d5 through exchanges, a queen move to b3, or central expansion and may target b7 after the bishop leaves c8.
Typical plans
Classical Slav positions usually keep a firm d5 and c6 pawn chain until Black can complete development and challenge the center. Black often castles kingside, places the b8 knight on d7, brings a rook to e8, and prepares an e5 break; a c5 break is another freeing plan in suitable structures. White seeks space and pressure on d5 or b7, while Black uses active piece play and timely exchanges to reach a sound ending.
Common mistakes
Playing e6 before developing the c8 bishop can create a cramped position; develop the bishop to f5 or g4 when the line permits.
After the white queen reaches b3, ignoring pressure on b7 and d5 can lose a pawn; answer with Qb6 or another concrete defense.
Pushing the e-pawn to e5 before development is complete can leave the center underdefended; prepare the break with coordinated pieces and a safe king.
Related openings
King's Indian Defense1.d4 Nf6 2.c4 g6. Let them build the middle, then strike it down.
Dutch Defense1.d4 f5. Claim e4 with a wing pawn and storm their king.
Grünfeld Defense1.d4 Nf6 2.c4 g6 3.Nc3 d5. Hand them the big middle, then hammer it.
Nimzo-Indian Defense1.d4 Nf6 2.c4 e6 3.Nc3 Bb4. Pin the knight and own e4 without a pawn.
Queen's Indian Defense1.d4 Nf6 2.c4 e6 3.Nf3 b6. Control e4 from the corner, at a distance.
Bogo-Indian Defense1.d4 Nf6 2.c4 e6 3.Nf3 Bb4+. A check on move three that develops for free.
Benoni Defense1.d4 Nf6 2.c4 c5 3.d5 e6. Lure the push, then march your majority.
Benko Gambit1.d4 Nf6 2.c4 c5 3.d5 b5. One pawn buys two open files, forever.