You lure their d-pawn forward, trade at its base, and get two prizes: a raking corner bishop and a pawn majority that marches. You play the lure, both replies, and a full game against an opponent that hogs all the space.
Start here
0
Chapter 1: The Lure
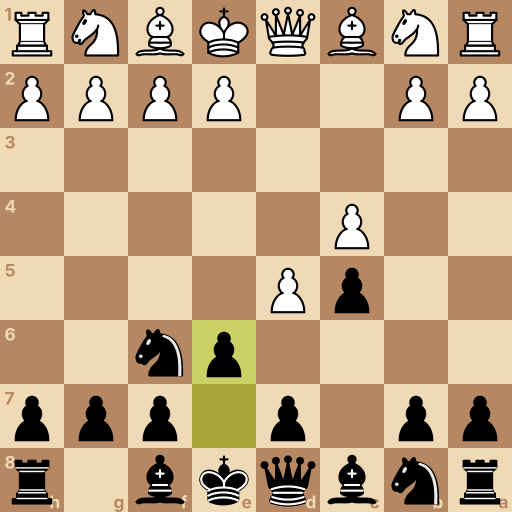
Main line: 1.d4 Nf6 2.c4 c5 3.d5 e6
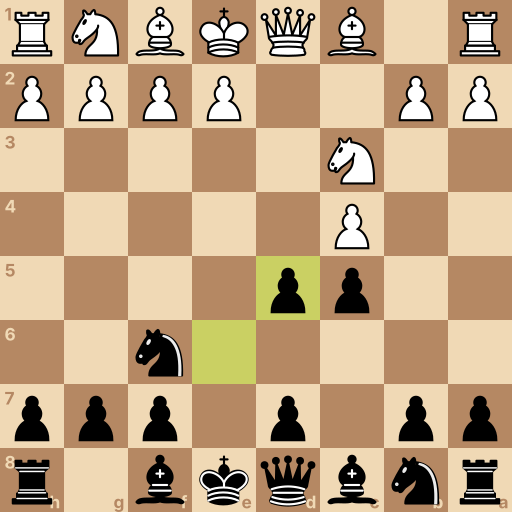
Position after 1.d4 Nf6 2.c4 c5 3.d5 e6. White to move.
These four squares are the middle of the board. A piece standing near them reaches everywhere; a piece stuck on the edge reaches half as far.
White moves first and takes d4. This defense pokes that pawn immediately — and wants it to run forward.
Your move: They open with the queen's pawn. Knight to f6 first — toward the middle.
1...Nf6 The knight in front of your rook — one jump to f6, toward the middle.
Your move: They add c4. Now the poke: push c5 and attack their d4 pawn head-on.
2...c5 The c-pawn, two steps — it pokes d4 and asks it to decide.
They push past to d5 — which is exactly what you wanted. That pawn now stands deep, fixed, and permanently short of pawn friends on the middle files.
Your next move starts taking it apart.
Your move: Attack the advanced pawn with e6.
3...e6 One step with the e-pawn — it attacks the pawn that pushed past.
Question: Why lure the pawn to d5 at all?
Answer: A fixed, advanced pawn shapes the whole game — and you build your two trumps around it. Think about what the trade on d5 leaves behind for each side. After the trades, you get a pawn majority on the queenside that can march, and a bishop on g7 raking a wide-open diagonal. They get a pawn on d5 to be proud of and defend forever. That bargain is the Benoni.
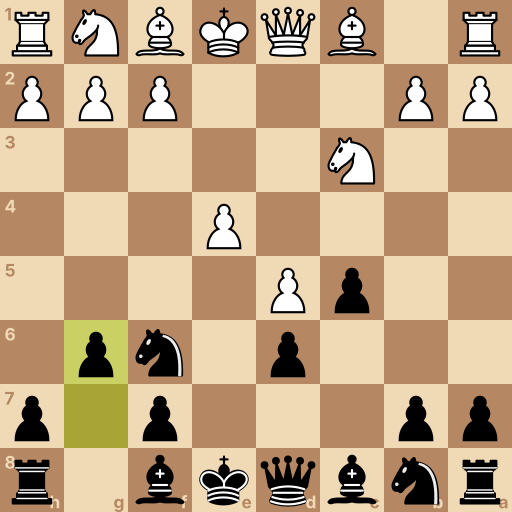
Position after 1.d4 Nf6 2.c4 c5 3.d5 e6 4.Nc3 exd5 5.cxd5 d6 6.e4 g6. White to move.
They develop. Now set the famous Benoni structure in three moves: trade, seal, and open the bishop's road.
Each move has one job; together they define your whole game.
Your move: Trade: take on d5 with your e-pawn.
4...exd5 The e-pawn takes on d5 and pulls their c-pawn forward next.
Your move: They take back with the c-pawn. Seal their pawn in place with d6 — it can never advance safely again.
5...d6 One step with the d-pawn — their d5 pawn is sealed for the game.
Your move: They grab the middle with e4. One step with your g-pawn — the corner opens for the bishop that will rake straight past their proud pawns.
6...g6 One step with the g-pawn — the long diagonal opens for your bishop.
Question: Count the pawns on the queenside files — theirs and yours. What do you find?
Answer: You have two against one — a majority that can make a passed pawn. Look at the a-, b-, and c-files only. Your a- and b-pawns face their lone a-pawn — your c5 pawn already stands past their line. Push a6 and b5 at the right moment and that majority rolls into a passed pawn. Trump one, secured; trump two goes to g7 next.
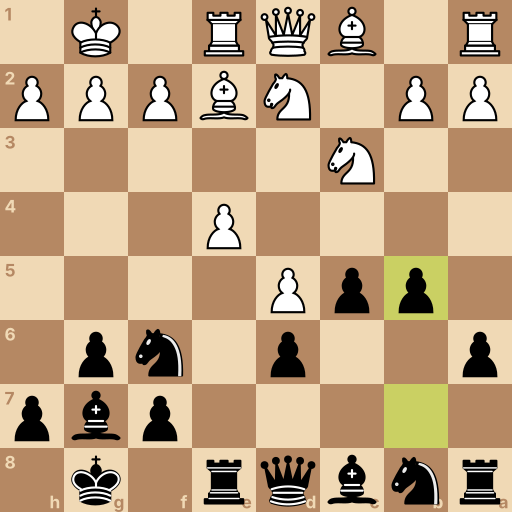
Position after 1.d4 Nf6 2.c4 c5 3.d5 e6 4.Nc3 exd5 5.cxd5 d6 6.e4 g6 7.Nf3 Bg7 8.Be2 O-O 9.O-O Re8 10.Nd2 a6 11.Re1 b5. White to move.
The structure is set. Now man it: bishop, castle, rook — then the majority starts to march.
Every piece has a known best square. Put each one there.
Your move: Bishop to g7 — the raking diagonal, aimed past their middle at the corner.
7...Bg7 The dark bishop takes the long diagonal — trump two in place.
Your move: They develop. Castle — two squares toward the corner.
8...O-O Two squares toward the corner — the rook jumps over by itself.
Your move: They castle too. Slide your rook to e8 — it leans on their e4 pawn, the front of their middle.
9...Re8 The rook takes the e-file and leans on their e4 pawn.
Your move: They reposition to hold e4. Start the march quietly: a6 first, so nothing can jump to b5 and interfere.
10...a6 One step with the a-pawn — it takes b5 away and readies the march.
Your move: They shuffle a rook. March: push b5, and the majority is moving.
11...b5 The b-pawn, two steps — the queenside majority starts to roll.
Question: Rook on e8, bishop raking, pawns marching. What decides this game?
Answer: The race between their middle push and your queenside pawns — and your pieces already stand right. They must push e5 to live; you must push b4 and c4 — ask whose pieces support their push better. This is the Benoni's bargain playing out: their e5 break runs into your rook and bishop; your b4-c4 march runs on open track. Keep the pieces on their posts and the majority does the winning.
Chapter 4: The Early Grab
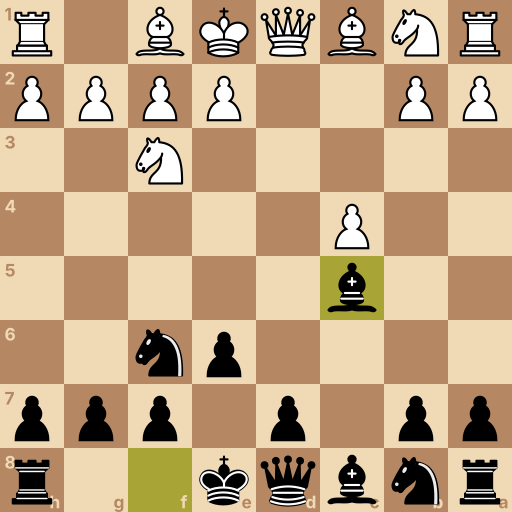
Main line: 1.d4 Nf6 2.c4 c5 3.dxc5 e6 4.Nf3 Bxc5
Position after 1.d4 Nf6 2.c4 c5 3.dxc5 e6 4.Nf3 Bxc5. White to move.
Some opponents grab your c-pawn instead of pushing past. The grab holds nothing.
Take your time — the pawn comes back with a developing move.
Your move: One step with your e-pawn — it opens the bishop's road straight at their new c5 pawn.
3...e6 One step with the e-pawn — the bishop's road to c5 opens.
Your move: They develop. Collect: bishop takes on c5 — the pawn is back, and your bishop developed doing it.
4...Bxc5 The bishop develops and takes the pawn back in one move.
Question: Material is even again. Compare the two positions — what did their grab accomplish?
Answer: It developed you — their d-pawn left the middle and your bishop got a free active square. Whose middle pawn is gone, and whose piece improved during the exchange? Their queen's pawn — the one that fights for the middle — vanished from the board, and your bishop stands active on c5 pointing at f2. You develop with easy moves and the middle is open to your pieces. Grabs that develop the other side are gifts.
Final challenge: The Space Hog (800 Elo)
The opponent says: More space. All the space. My pawns go forward and stay there.
Your tasks in the game, in order:
Knight to f6, toward the middle.
Poke their queen's pawn — push c5.
They pushed past — attack the deep pawn with e6.
Trade at the base — take on d5.
Position after 1.d4 Nf6 2.c4 c5 3.d5 e6 4.Nc3 exd5. White to move.
History of the Benoni Defense
The Modern Benoni begins 1.d4 Nf6 2.c4 c5 3.d5 e6 and occupies ECO codes A60 through A79. Benoni comes from a Hebrew phrase meaning son of sorrow, a name first attached to related defenses in the nineteenth century. The modern pawn structure and its theory became established in master play during the mid-twentieth century.
Main ideas for Black
Black invites the d-pawn to advance, attacks it with 3...e6, and after 4.Nc3 exd5 5.cxd5 d6 accepts less space for active piece play. The g7 bishop works along the long diagonal, the f6 knight pressures e4, and a rook commonly reaches e8. White builds a broad center with pawns on d5 and e4, then tries to advance e5 or use the space to support a kingside attack.
Typical plans
The typical structure gives White central and kingside space, while Black has a queenside pawn majority and pressure against e4. Black prepares a6 and b5, then may continue b4 or c4 to gain activity and create a passed pawn. White usually organizes e5, f4, or a kingside attack; Black relies on the g7 bishop, the e-file, and timely queenside breaks to counter the center.
Common mistakes
Do not push b5 before development and tactical conditions support it; castle, place the rook on e8, and prepare the break with a6.
A common error is treating the d5 pawn as an immediate target; attack White's supporting center and create queenside counterplay instead.
Do not allow White to play e5 without resistance; coordinate the f6 knight, e8 rook, and g7 bishop against the central advance.
Related openings
King's Indian Defense1.d4 Nf6 2.c4 g6. Let them build the middle, then strike it down.
Slav Defense1.d4 d5 2.c4 c6. Guard the middle and keep your bishop free.
Dutch Defense1.d4 f5. Claim e4 with a wing pawn and storm their king.
Grünfeld Defense1.d4 Nf6 2.c4 g6 3.Nc3 d5. Hand them the big middle, then hammer it.
Nimzo-Indian Defense1.d4 Nf6 2.c4 e6 3.Nc3 Bb4. Pin the knight and own e4 without a pawn.
Queen's Indian Defense1.d4 Nf6 2.c4 e6 3.Nf3 b6. Control e4 from the corner, at a distance.
Bogo-Indian Defense1.d4 Nf6 2.c4 e6 3.Nf3 Bb4+. A check on move three that develops for free.
Benko Gambit1.d4 Nf6 2.c4 c5 3.d5 b5. One pawn buys two open files, forever.