You give one pawn to open two files at their queenside, and your rooks collect rent on them for the rest of the game. You play the gambit, both replies, and a full game against an opponent that takes everything and holds on.
Start here
0
Chapter 1: The Offer
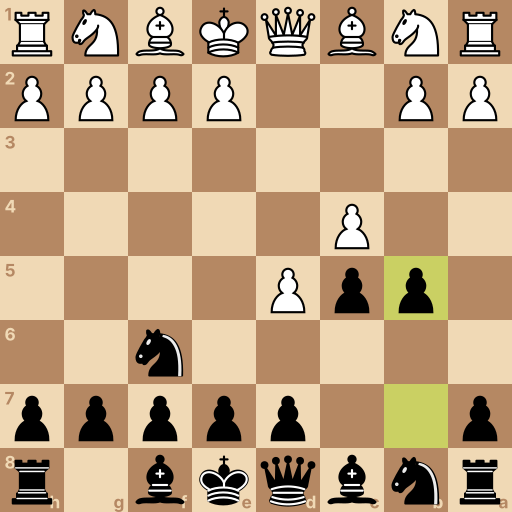
Main line: 1.d4 Nf6 2.c4 c5 3.d5 b5
Position after 1.d4 Nf6 2.c4 c5 3.d5 b5. White to move.
These four squares are the middle of the board. A piece standing near them reaches everywhere; a piece stuck on the edge reaches half as far.
White moves first and grabs space. This defense answers with a famous bargain: one pawn, paid once, for open files that last all game.
Your move: They open with the queen's pawn. Knight to f6 — toward the middle.
1...Nf6 The knight in front of your rook — one jump to f6, toward the middle.
Your move: They add c4. Poke their middle with c5 and invite the push.
2...c5 The c-pawn, two steps — it pokes d4 and invites d5.
Your move: They push past to d5. Now the Benko move: push b5 — a whole pawn, offered on purpose.
3...b5 The b-pawn, two steps — the gambit pawn goes on the table.
Question: What is the pawn buying?
Answer: The a- and b-files — open roads your rooks will own for the whole game. Picture the queenside after the pawns trade off — where do rooks go? When the dust settles, the a- and b-files are open or half-open, your rooks stand on both, and their queenside pawns spend the game under pressure. One pawn, paid once; pressure, collected forever. That is the Benko.
This is the Benko Gambit. Most opponents take — the next chapter opens the files.
If they decline, chapter four shows why that pays you too.
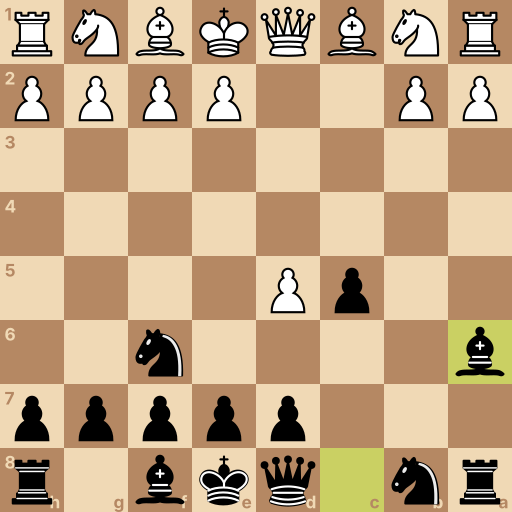
Position after 1.d4 Nf6 2.c4 c5 3.d5 b5 4.cxb5 a6 5.bxa6 Bxa6. White to move.
They take. Now feed the second pawn in — a6 offers another trade, and every trade opens another file.
This looks like losing pawns. Watch what the files are worth.
Your move: Push a6 and offer the trade that opens the a-file.
4...a6 One step with the a-pawn — it pries the files open.
Your move: They take again. Take back with your bishop — it develops onto a6, where it stares straight at their kingside's light squares.
5...Bxa6 The bishop takes back on a6 — developed, and aimed across the board.
Question: You are a pawn down and smiling. Take stock: what do you have for it?
Answer: An open a-file, a half-open b-file, a developed bishop — and their queenside full of holes. Count the open roads leading into their camp. Rooks will stand on a8 and b8 hitting real targets; the a6 bishop cuts across the board; their b2 pawn is a lifelong patient. You never hurry to win the pawn back — the pressure is worth more than the pawn.
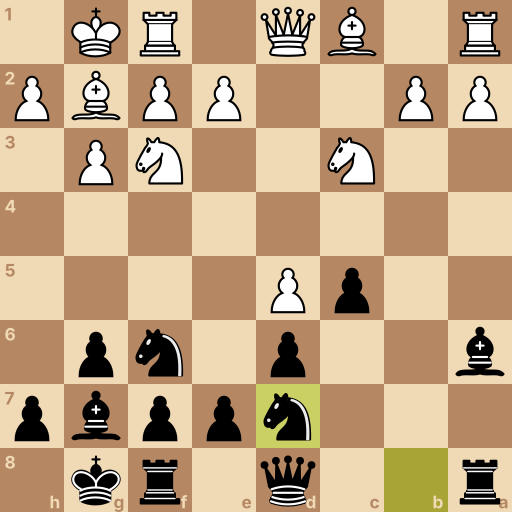
Position after 1.d4 Nf6 2.c4 c5 3.d5 b5 4.cxb5 a6 5.bxa6 Bxa6 6.Nc3 g6 7.Nf3 Bg7 8.g3 O-O 9.Bg2 d6 10.O-O Nbd7. White to move.
Files bought and paid for. Now the collectors take their posts: bishop to the long diagonal, king to safety, and the heavy pieces to the open files.
Every move here is known in advance — that is the Benko player's luxury.
Your move: One step with your g-pawn — the dark bishop gets the long diagonal, where it presses the same queenside your rooks will.
6...g6 One step with the g-pawn — the corner opens for the bishop.
Your move: They develop. Bishop to g7 — aimed down the long diagonal at their queenside, same neighborhood as everything else you own.
7...Bg7 The dark bishop takes the long diagonal toward their queenside.
Your move: They set up their own bishop. Castle — two squares toward the corner.
8...O-O Two squares toward the corner — the rook jumps over by itself.
Your move: They fianchetto too. Play d6 — it holds your c5 pawn and completes the structure.
9...d6 One step with the d-pawn — it props c5 and finishes the structure.
Your move: They castle. Bring the queenside knight to d7 — it supports c5 and can jump to b6 or e5 when the files need more weight.
10...Nbd7 The knight tucks into d7, feeding the queenside pressure.
Question: Everything is posted. Say the standing plan in one line.
Answer: Queen to a5 or b6, rooks to a8 and b8, and squeeze the files forever. The files are the investment — the heavy pieces are the return. Queen and rooks pile onto the open files and their pieces spend the game tied to b2 and a2. Trades don't help them — even the endgame keeps paying you. Rent, collected forever.
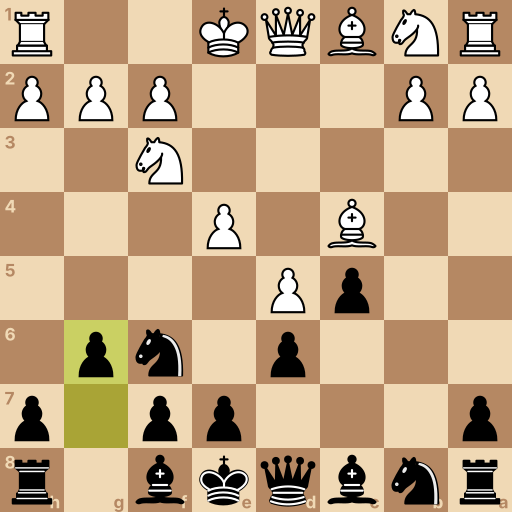
Position after 1.d4 Nf6 2.c4 c5 3.d5 b5 4.Nf3 bxc4 5.e4 d6 6.Bxc4 g6. White to move.
Some opponents refuse the gift and just develop. Look again at the board — their c4 pawn is attacked and their knight didn't help it.
When a gambit is declined, take whatever they left behind.
Your move: Take the c4 pawn.
4...bxc4 Your b-pawn takes on c4 — declining the gambit left it free.
Your move: They grab the middle with e4. Play d6 — seal their d5 pawn and hold your ground.
5...d6 One step with the d-pawn — their d5 pawn is sealed, your c4 pawn stands.
Your move: Their bishop collects your c4 pawn back. Fine — one step with the g-pawn, and your normal setup continues as if nothing happened.
6...g6 One step with the g-pawn — same structure, same plans, no pawn spent.
Question: The gambit was declined and the pawns came out even. Who got the better opening?
Answer: You — the Benko structure at no cost, with the half-open b-file thrown in. You have the setup the gambit usually pays a pawn for — check the price you paid. The fianchetto, the d6 seal, and the b-file — everything you normally buy with a pawn, free of charge. Declining a gambit is honest, but against the Benko it mostly means paying the pressure without collecting the pawn.
Final challenge: The Keeper (800 Elo)
The opponent says: You give, I keep. Every pawn you offer goes in the vault.
Your tasks in the game, in order:
Put the pawn on the table — push b5.
They took — pry with a6 and open the second file.
Take back with the bishop, straight onto a6.
Open the corner for the raking bishop — one step to g6.
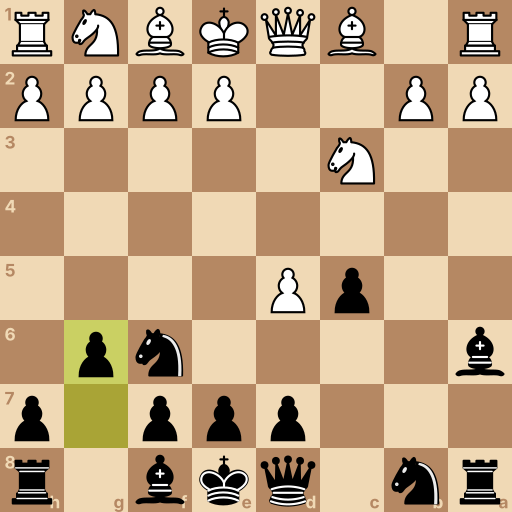
Position after 1.d4 Nf6 2.c4 c5 3.d5 b5 4.cxb5 a6 5.bxa6 Bxa6 6.Nc3 g6. White to move.
History of the Benko Gambit
The Benko Gambit begins 1.d4 Nf6 2.c4 c5 3.d5 b5 and is classified under ECO codes A57 through A59. It is named after Pal Benko, who popularized the opening internationally during the 1960s. Earlier European sources often called the same opening the Volga Gambit, after the Volga River.
Main ideas for Black
Black offers the b-pawn so that 4.cxb5 a6 5.bxa6 Bxa6 opens the a-file and leaves the b-file half-open. The a6 bishop takes the f1-a6 diagonal and slows White's kingside development, while the g7 bishop later pressures b2 along the long diagonal. Black usually accepts a lasting pawn deficit in return for active rooks and queenside targets. White tries to consolidate the extra pawn, complete development, and neutralize pressure on a2 and b2.
Typical plans
Black fianchettos the dark-squared bishop, castles, supports c5 with d6, and places the queenside knight on d7. The queen commonly reaches a5 or b6, while the rooks occupy a8 and b8 to attack a2 and b2. White seeks central play with e4 and may return material to finish development; Black keeps pieces active, uses the open files, and looks for queenside entry squares rather than forcing immediate pawn recovery.
Common mistakes
Do not rush to recover the sacrificed pawn; develop the g7 bishop and place the heavy pieces on the open queenside files.
Sacrificing on b5 without following with a6 leaves fewer open lines, so use the second pawn offer to open the a-file.
A common error is starting a kingside pawn attack while queenside pressure is undeveloped; coordinate the queen and rooks against a2 and b2.
Related openings
King's Indian Defense1.d4 Nf6 2.c4 g6. Let them build the middle, then strike it down.
Slav Defense1.d4 d5 2.c4 c6. Guard the middle and keep your bishop free.
Dutch Defense1.d4 f5. Claim e4 with a wing pawn and storm their king.
Grünfeld Defense1.d4 Nf6 2.c4 g6 3.Nc3 d5. Hand them the big middle, then hammer it.
Nimzo-Indian Defense1.d4 Nf6 2.c4 e6 3.Nc3 Bb4. Pin the knight and own e4 without a pawn.
Queen's Indian Defense1.d4 Nf6 2.c4 e6 3.Nf3 b6. Control e4 from the corner, at a distance.
Bogo-Indian Defense1.d4 Nf6 2.c4 e6 3.Nf3 Bb4+. A check on move three that develops for free.
Benoni Defense1.d4 Nf6 2.c4 c5 3.d5 e6. Lure the push, then march your majority.