You give your bishop the b2 square on move one, and it gnaws at their middle for the rest of the game. You play the setup, both replies, and a full game against an opponent that slams a door on the wrong hinge.
Start here
0
Chapter 1: One Move, One Job
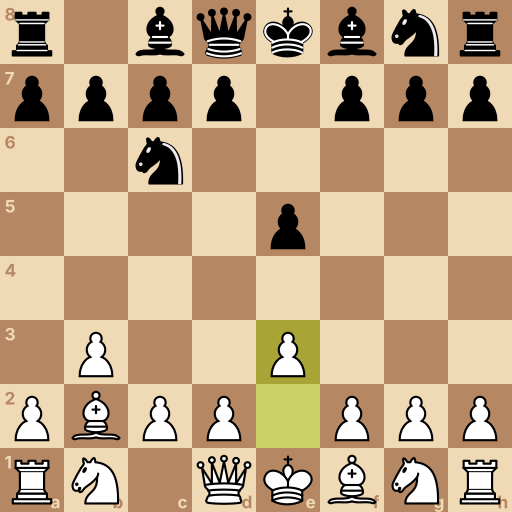
Main line: 1.b3 e5 2.Bb2 Nc6 3.e3
Position after 1.b3 e5 2.Bb2 Nc6 3.e3. Black to move.
These four squares are the middle of the board. A piece standing near them reaches everywhere; a piece stuck on the edge reaches half as far.
White moves first. This opening's first move has exactly one purpose — and that purpose bites the middle harder than most pawn moves do.
Your move: One step with your b-pawn. Its only job: hand the b2 square to your bishop.
1.b3 One step with the b-pawn — it exists to open the bishop's corner.
Your move: They take the middle with e5. Bishop to b2 — and it bites that pawn from all the way across the board.
2.Bb2 The bishop takes b2 and attacks their e5 pawn at once.
Your move: They guard with the knight. One step with your e-pawn — quiet support, and your king's bishop gets a door.
3.e3 One step with the e-pawn — support, and the second bishop's door.
Question: Your bishop attacks e5 from its own back rank. Why is that better than attacking it with a pawn?
Answer: The bishop pressures e5 forever without ever becoming a target itself. Ask what they can ever do to a bishop sitting on b2. A pawn attacking e5 can be traded or pushed past; the b2 bishop just sits there, biting, for fifty moves if it has to. Their middle carries a permanent tenant complaint. That is the Nimzo-Larsen.
This is the Nimzowitsch-Larsen Attack. One bishop, one diagonal, one long argument about e5.
Next you go after the pawn's defender — with a bishop trick borrowed from a famous opening.
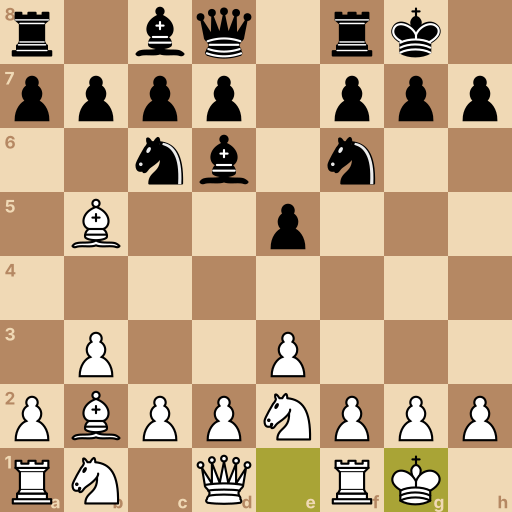
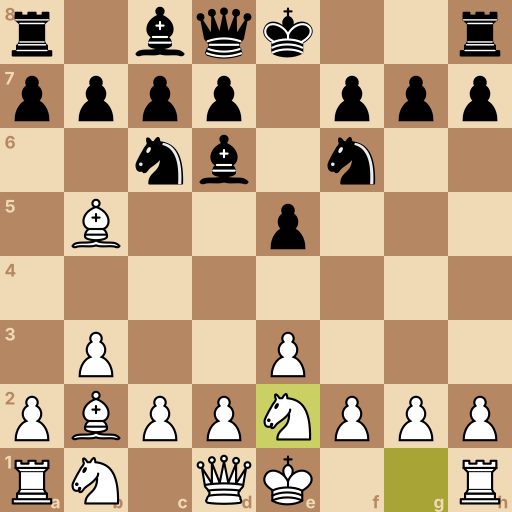
Position after 1.b3 e5 2.Bb2 Nc6 3.e3 Nf6 4.Bb5 Bd6 5.Ne2 O-O 6.O-O. Black to move.
Their e5 pawn stands because the c6 knight guards it. So go after the guard — pin it, the way the Ruy Lopez does.
Two bishops working: one bites the pawn, the other holds down its guard.
Your move: Bishop to b5 — pin the c6 knight against their king.
4.Bb5 The bishop pins the guard — e5's protection is now frozen.
Your move: They develop the bishop. Your knight takes the quiet road — e2, where their e5 pawn can never push forward and kick it.
5.Ne2 The knight picks e2 — the e-pawn's advance will never touch it there.
Your move: They castle. Castle too — two squares toward the corner.
6.O-O Two squares toward the corner — the rook jumps over by itself.
Question: Why did the knight choose modest e2 over its usual f3?
Answer: On f3 the e-pawn's push would kick it; on e2 it is kick-proof and keeps every road open. Picture their e-pawn stepping to e4 with your knight on f3. On f3 the knight hands them a free tempo the moment e4 lands. From e2 it watches the same fight, jumps to g3 or f4 or d4 later, and never gets chased. Choosing squares your opponent can't touch — the whole opening in miniature.
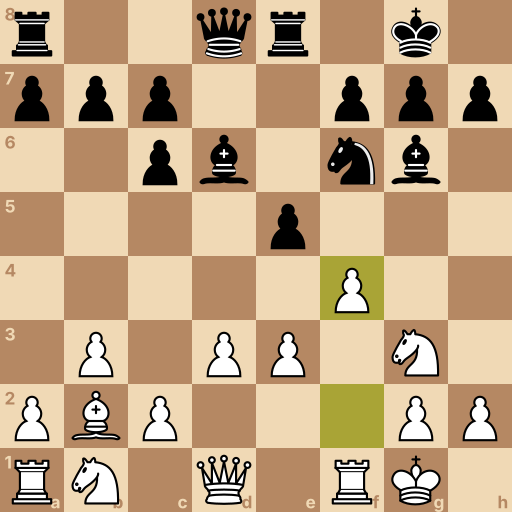
Position after 1.b3 e5 2.Bb2 Nc6 3.e3 Nf6 4.Bb5 Bd6 5.Ne2 O-O 6.O-O Re8 7.Bxc6 dxc6 8.d3 Bf5 9.Ng3 Bg6 10.f4. Black to move.
Everything is placed. Now the plan executes: remove e5's guard, re-route the knight, and pry the pawn loose with f4.
Each move follows from the last — watch the dark squares change hands.
Your move: Take the c6 knight — the guard leaves the board.
7.Bxc6 Bishop takes the guard — e5 loses its best defender.
Your move: They recapture with the d-pawn. Quiet step: d3 — it keeps their pieces off e4 and readies your knight's next hop.
8.d3 One step with the d-pawn — e4 stays covered, the plan continues.
Your move: Their bishop comes out to f5. Meet it: knight to g3, attacking the bishop and heading toward the kingside.
9.Ng3 The knight hops to g3 — hitting the bishop, eyeing f5 and h5.
Your move: The bishop retreats. Now the pry: push f4 at their e5 pawn. If it takes, your rook's file opens; if it stands, you take and the b2 bishop finally sees daylight.
10.f4 The f-pawn pries at e5 — every answer opens something for you.
Question: The e5 pawn has been under watch since move two. When it finally trades off, what changes?
Answer: The b2 bishop's diagonal opens all the way, and the dark squares become yours. Trace the b2 bishop's line the moment e5 disappears. With e5 gone the bishop rakes to g7, the f-file carries your rook, and every dark square in their camp needs a piece to cover it. Two quiet first moves, one long squeeze — cashed.
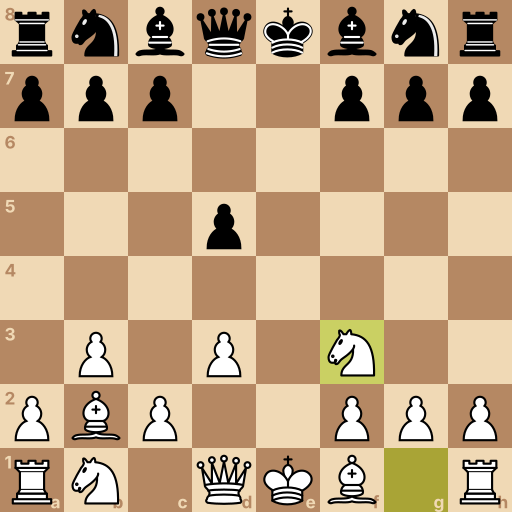
Position after 1.b3 e5 2.Bb2 e4 3.d3 exd3 4.exd3 d5 5.Nf3. Black to move.
The instinctive reply: they push e4 and slam the door on your bishop's diagonal.
Doors slammed by one pawn swing back open. Start the hinges creaking at once.
Your move: One step with your d-pawn — it attacks the door itself.
3.d3 One step with the d-pawn — the slammed door comes under attack.
Your move: They trade. Take back with your e-pawn — the diagonal is open again, and your second bishop got a door of its own.
4.exd3 The e-pawn takes back — both bishops now breathe.
Your move: They take the middle with d5. Develop with a purpose: knight to f3 — no e-pawn of theirs can ever kick it now.
5.Nf3 The knight takes f3 — their kicking pawn left the board two moves ago.
Question: Their door-slam traded itself off. What did the exchange really cost them?
Answer: Two moves spent on a pawn that vanished — while both your bishops got open roads. Count their remaining gains from e5 and e4 — then count your open lines. The pawn that slammed the door is gone, the moves it took are gone with it, and your bishops came out of the exchange with better roads than before. Doors slammed in the Larsen just swing back harder.
Final challenge: The Slammer (800 Elo)
The opponent says: A corner bishop? I'll slam every door it ever looks through.
Your tasks in the game, in order:
Bishop to b2 — it bites e5 from the corner.
One quiet step to e3 — the second bishop's door.
Pin the guard — bishop to b5, onto the c6 knight.
Knight to e2 — the square no pawn can ever kick.
Position after 1.b3 e5 2.Bb2 Nc6 3.e3 Nf6 4.Bb5 Bd6 5.Ne2. Black to move.
History of the Nimzowitsch-Larsen Attack
The Nimzowitsch-Larsen Attack begins 1.b3 and is classified under ECO A01. It is named for Aron Nimzowitsch, who used the flank development in the early twentieth century, and Bent Larsen, who made it a regular weapon in top-level play during the 1960s and 1970s. Their practice established 1.b3 as an independent opening.
Main ideas for White
White prepares Bb2 immediately, placing the dark-squared bishop on the a1-h8 diagonal and pressuring e5 and g7. After Black occupies e5, e3 opens the other bishop, and Bb5 can pin the c6 knight that defends the pawn. The g1 knight may develop to e2, avoiding an e4 tempo while retaining routes to g3, f4, and d4. Black usually builds a classical center with e5 and d5, then tries to gain space with e4 or blunt the b2 bishop.
Typical plans
White often exchanges Bxc6 to remove an e5 defender, then uses d3 and Ng3 before challenging the center with f4. If the e5 pawn exchanges, the b2 bishop gains scope toward g7 and the f-file can open for White's rook. When Black advances e4, White can answer d3 and recapture with the e-pawn, reopening the long diagonal. Black seeks central space and kingside development, while White works against e5 with f4 and sometimes d4.
Common mistakes
Do not develop the b2 bishop and forget the e5 pawn's defenders; use Bb5 to pin or exchange the c6 knight.
Do not place the king's knight on f3 when e4 will chase it with tempo; consider Ne2 and reroute it later.
Do not push f4 before completing development and securing the king; prepare d3 and Ng3 so the central challenge has support.
Related openings
English Opening1.c4 e5 2.Nc3. Grip the middle from the side and squeeze.
Réti Opening1.Nf3 d5 2.c4. Press their middle without offering a target.
King's Indian Attack1.Nf3 d5 2.g3. The same house every game, then the e5 wedge.
Bird's Opening1.f4. Claim e5 from the wing and attack the king.