You answer 1.e4 with a quiet prop, tuck your bishop beside your king, and strike the big middle they were allowed to build. You play the setup, both replies, and a full game against an opponent that pushes every middle pawn at you.
Start here
0
Chapter 1: The Quiet Prop
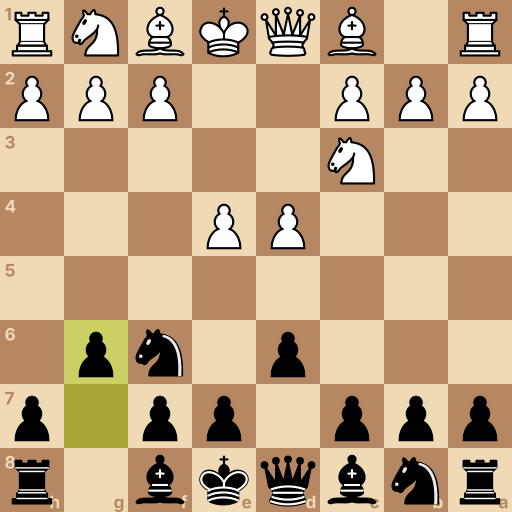
Main line: 1.e4 d6 2.d4 Nf6 3.Nc3 g6
Position after 1.e4 d6 2.d4 Nf6 3.Nc3 g6. White to move.
These four squares are the middle of the board. A piece standing near them reaches everywhere; a piece stuck on the edge reaches half as far.
White moves first and will fill the middle with pawns. This defense does not stop them — it gets ready to hit what they build.
Your move: They open with 1.e4. Answer with one quiet step: d6. It looks small — it guards e5, the square your whole plan runs through, and it has a bite you will see in chapter four.
1...d6 One step with the d-pawn — the quiet prop that guards e5.
Your move: They take the whole middle with d4. Bring your kingside knight to f6 — it attacks their e4 pawn straight away, so they must spend a move on defense.
2...Nf6 The knight in front of your rook — one jump to f6 hits their e4 pawn.
Your move: They guard e4 with the knight. One small step with your g-pawn opens the corner — the long diagonal your bishop will live on.
3...g6 One step with the g-pawn — it opens the door for your dark bishop.
Question: They own the middle with two pawns and you have made three quiet moves. Are you losing?
Answer: No — their big middle is the target your setup is aimed at. Look where your knight, your d6 pawn, and the open diagonal all point. Every pawn they pushed is something you can attack. Your pieces are aimed, your props are set, and the e5 strike is coming. Letting them build first, then hitting the building — that is the Pirc.
This is the Pirc Defense. They got the middle; you got aim.
Before the strike, the king tucks in. The next chapter finishes the house.
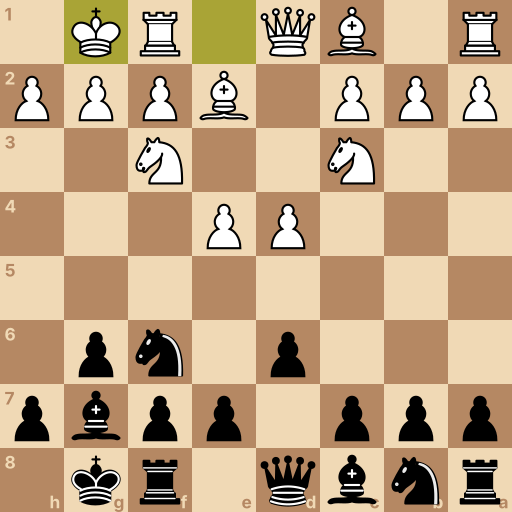
Position after 1.e4 d6 2.d4 Nf6 3.Nc3 g6 4.Nf3 Bg7 5.Be2 O-O 6.O-O. Black to move.
Two moves finish the house: the bishop takes the corner you opened, and the king castles in behind it.
Do these before any fight — a strike with your king in the middle punishes you, not them.
Your move: Slide your bishop to g7. It sits safe beside your king, aimed through the middle they built.
4...Bg7 The dark bishop tucks into g7, onto the long diagonal.
Your move: They develop calmly. Castle — king two squares toward the corner, under the roof.
5...O-O Two squares toward the corner — the rook jumps over by itself.
Question: House done, king safe. What was the point of all this patience?
Answer: The e5 strike lands next move, with everything ready behind it. Count what already supports the e5 square. King safe, bishop aimed, d6 guarding e5 — the strike needs nothing more. Next chapter you play it, and their big middle has to answer.
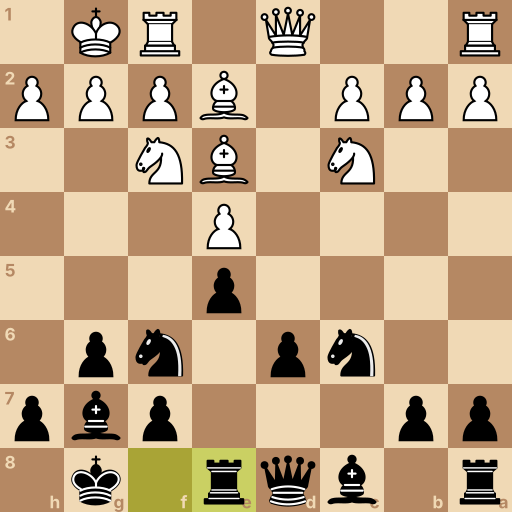
Position after 1.e4 d6 2.d4 Nf6 3.Nc3 g6 4.Nf3 Bg7 5.Be2 O-O 6.O-O e5 7.d5 c6 8.dxc6 Nxc6 9.Be3 Re8. White to move.
Both kings are safe and your aim is set. Now the move the quiet prop was for: e5, hitting their d4 pawn.
This chapter plays their most common answer — they push past and close the middle.
Your move: Push your e-pawn two squares, to e5. It lands guarded by d6 and attacks their d4 pawn.
6...e5 The e-pawn, two steps — it lands guarded and hits d4.
Your move: They push d5, closing the middle. Hit the new pawn chain from the side: one step with your c-pawn, to c6.
7...c6 One step with the c-pawn — it attacks the d5 pawn from the side.
Your move: They take your c-pawn. Take back with your knight — toward the middle, and their proud d5 pawn is gone from the board.
8...Nxc6 The knight beside your rook takes back on c6, toward the middle.
Your move: They develop. Slide your rook to e8 — it stands behind your e5 pawn and on the file where the game will open.
9...Re8 The rook that castled slides to e8, behind your middle pawn.
Question: Their big middle is down to one pawn and your pieces all have jobs. What is the plan from here?
Answer: Work on d4 — the hole their pawn left is a home for your knight. Find the middle square no white pawn can ever guard again. Their d-pawn is gone, so d4 can never be guarded by a pawn — a knight that lands there stays. Aim your pieces at it, keep the e5 pawn solid, and the middle they built becomes the middle you own.
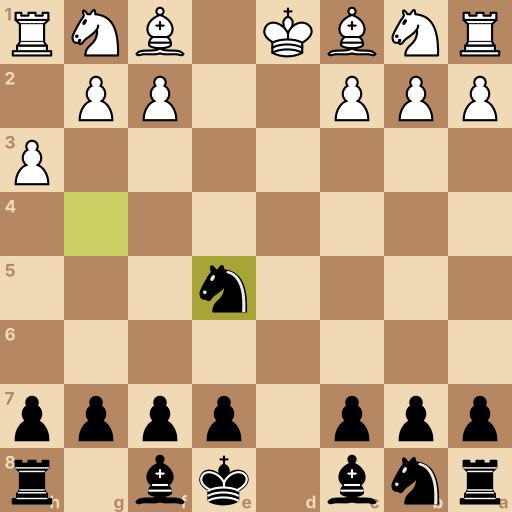
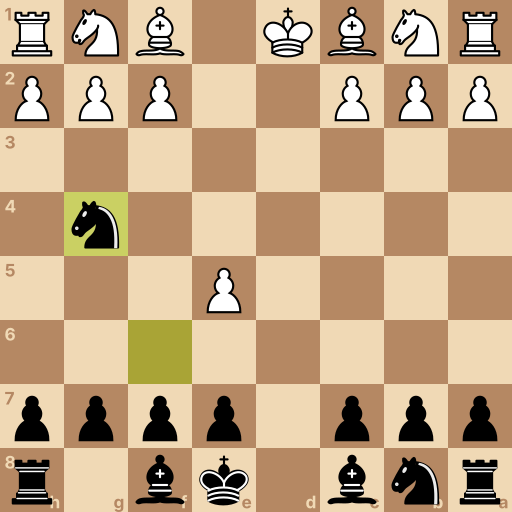
Position after 1.e4 d6 2.d4 Nf6 3.e5 dxe5 4.dxe5 Qxd1+ 5.Kxd1 Ng4 6.h3 Nxe5. White to move.
The move beginners fear: they push e5 and chase your knight on move three.
This is where the quiet d6 prop bites. Your pawn has been waiting for exactly this.
Your move: Don't move the knight — take the pawn that attacked it. Your d6 pawn captures on e5.
3...dxe5 The quiet prop takes the chasing pawn — d6 captures on e5.
Your move: They take back — and their queen's file is open behind them. Take their queen, with check.
4...Qxd1+ The d-file is wide open — your queen takes theirs on d1.
Your move: Their king had to take back — castling is gone for them. Their e5 pawn still attacks your knight, so jump it to g4, where it attacks that pawn right back.
5...Ng4 The chased knight jumps to g4 and attacks the e5 pawn itself.
Your move: They poke your knight with h3. Let it feast on the way out: take the e5 pawn.
6...Nxe5 The knight escapes the poke by taking the pawn it was attacking.
Question: A pawn up, queens off, their king stuck in the middle. What is your plan?
Answer: Develop, castle, and point your rooks at the middle. One king can still reach a corner and one can't — build toward that. The chase cost them their castle and gained them nothing. Bring your pieces out, castle, and let your rooks stare down the middle at the king that can't leave. Patience finishes what the prop started.
Final challenge: The Bulldozer (800 Elo)
The opponent says: Middle pawns, full speed ahead. Your little knight better run.
Your tasks in the game, in order:
Bring your kingside knight to f6.
They chase it with e5 — take that pawn with your d6 prop.
The file opened behind them — take their queen, with check.
Jump the knight to g4, attacking their e5 pawn.
Position after 1.e4 d6 2.d4 Nf6 3.e5 dxe5 4.dxe5 Qxd1+ 5.Kxd1 Ng4. White to move.
History of the Pirc Defense
The Pirc Defense is defined by 1.e4 d6 2.d4 Nf6 3.Nc3 g6 and occupies ECO codes B07 through B09. It is named after Slovenian grandmaster Vasja Pirc, who used the setup regularly in tournament play. The defense became established in international practice during the middle of the twentieth century.
Main ideas for Black
Black permits White to occupy e4 and d4, then attacks that center with pieces and pawn breaks. The move d6 supports e5, Nf6 pressures e4, and g6 prepares Bg7 on the a1-h8 diagonal. Black normally castles kingside before opening the position. White often develops Nc3 and Nf3, but can also build an early kingside attack with f3, Be3, Qd2, and h4.
Typical plans
With pawns on d6 and e5, Black challenges d4 and can use c6 to undermine a white pawn that advances to d5. The e-file and d4 square become useful after central exchanges, while the g7 bishop gains scope as the center opens. White usually uses extra space for kingside or central activity. Black seeks counterplay with e5 or c5, develops the queenside pieces, and avoids advancing the castled king's pawns without a concrete reason.
Common mistakes
Striking with e5 before castling can open lines toward the king; complete Bg7 and O-O before changing the center.
Retreating the f6 knight automatically after an early e5 may miss dxe5; check whether the d6 pawn can remove the attacker.
Letting White maintain d4 and e4 without counterplay concedes lasting space; prepare e5 or c5 and time the break when developed.
Related openings
Caro-Kann Defense1.e4 c6. Answer 1.e4 with a middle pawn that arrives guarded.
French Defense1.e4 e6. One pawn guards, the next one strikes the middle.