You give one pawn on move two to pull their middle pawn away and open a file for your rook. You play the offer, both replies, and a full game against an opponent that grabs the pawn and never lets go.
Start here
0
Chapter 1: The Offer
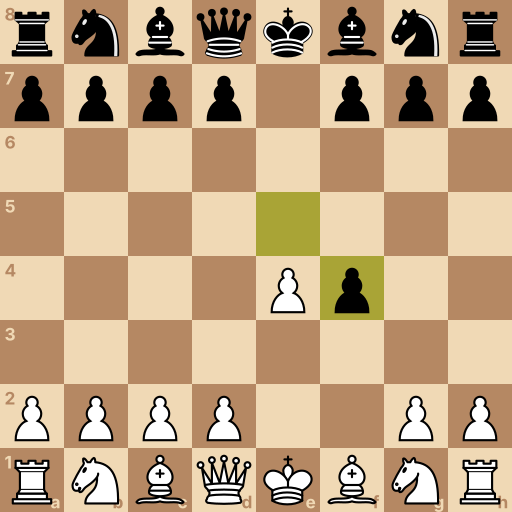
Main line: 1.e4 e5 2.f4 exf4
Position after 1.e4 e5 2.f4 exf4. White to move.
These four squares are the middle of the board. A piece standing near them reaches everywhere; a piece stuck on the edge reaches half as far.
White moves first. Most openings fight for the middle slowly. This one spends a pawn to own it outright.
Your move: Push the pawn in front of your king two squares, to e4, and take your first middle square.
1.e4 The pawn in front of your king — two steps to e4 grabs the middle.
They answer with e5, and the two pawns block each other in the middle.
Most openings now work around that e5 pawn. This one asks it to leave.
Your move: Push the pawn in front of your king's bishop two squares, to f4. It attacks their e5 pawn — and yes, it is free to take.
2.f4 The f-pawn, two steps forward — it offers itself to their middle pawn.
Question: They take. What did the pawn buy?
Answer: Their middle pawn is gone, and the f-file has no white pawn on it. Look at what just left the middle, and which of your files opened up. e5 is empty, so d4 can be yours next — and once you castle, your rook stares straight down the open f-file. The pawn bought the middle and a file.
This is the King's Gambit. One pawn spent, and their grip on the middle is gone.
Their sharpest try now is a queen check on h4. The next chapter teaches the one move that stops it before it ever happens.
Chapter 2: The Queen Check
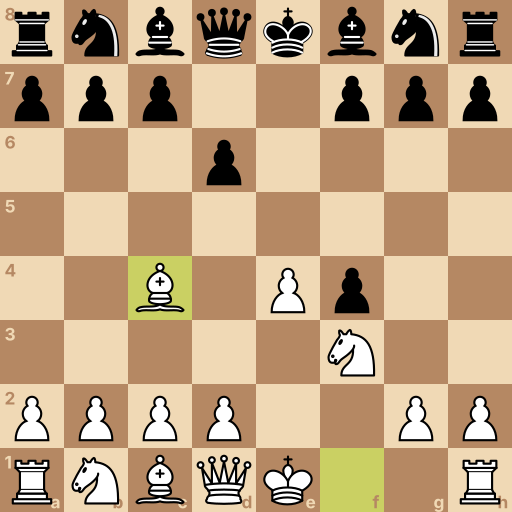
Main line: 1.e4 e5 2.f4 exf4 3.Nf3 d6 4.Bc4
Position after 1.e4 e5 2.f4 exf4 3.Nf3 d6 4.Bc4. Black to move.
Look at the road from their queen to h4. With your f-pawn gone, Qh4 would be check, and your king would have to walk.
Every King's Gambit player learns the answer before it is ever needed. One knight jump closes the road for good.
Your move: Jump your kingside knight to f3. It stands on h4's road — the check is gone before they ever play it.
3.Nf3 The knight beside your king's rook — one jump to f3 covers h4.
Your move: They prop with d6. Slide your bishop out to c4 — it points straight at f7, the one square only their king defends.
4.Bc4 The king's bishop, out to c4 — the diagonal to f7 is wide open.
Question: Why did the knight come out before the bishop, the queen, anything?
Answer: It shuts the door on the h4 check. Think about the check you just read about. One jump did two jobs: h4 is covered, and the knight watches e5 and d4 in the middle. When one move answers a threat and develops a piece, it goes first.
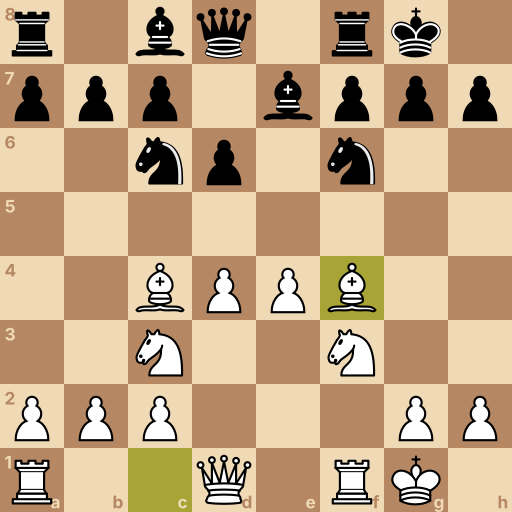
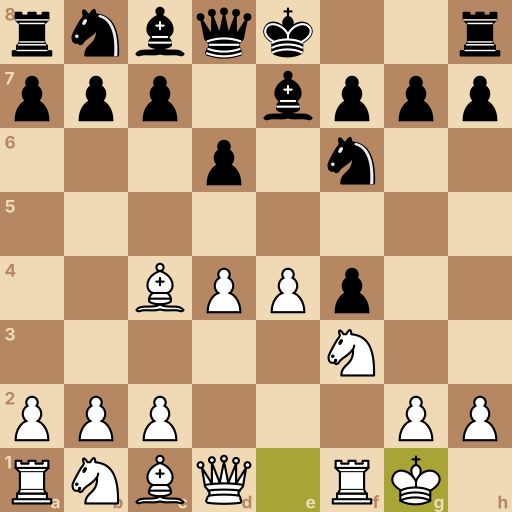
Position after 1.e4 e5 2.f4 exf4 3.Nf3 d6 4.Bc4 Be7 5.d4 Nf6 6.Nc3 O-O 7.O-O Nc6 8.Bxf4. Black to move.
From here the plan is plain work: pieces out, king safe. But this castle is special — with your f-pawn gone, castling drops your rook straight onto an open file.
And their extra pawn on f4? It is not going anywhere. You collect it on your own time.
Your move: They tuck their bishop on e7. Push your queen's pawn two squares, to d4 — the square their e5 pawn used to watch is yours now.
5.d4 The queen's pawn, two steps — nothing of theirs guards d4 anymore.
Your move: Their knight comes to f6, eyeing your e4 pawn. Guard it — your queenside knight to c3.
6.Nc3 The knight beside your queen's rook — one jump to c3 guards e4.
Your move: They castle. Castle too — and watch where your rook lands: an open file, staring at their f4 pawn and at f7 beyond it.
7.O-O Two squares toward the corner — the rook jumps over by itself.
Your move: Their last knight comes out. Now collect: take the f4 pawn with your bishop. The gambit pawn comes home, and every one of your pieces is out.
8.Bxf4 Your dark bishop's road to f4 is open — take back the pawn it was promised.
Question: Pieces out, king safe, pawn back. Where does your play come from?
Answer: Stack your heavy pieces on the open f-file. You have one file with no pawn of yours on it — use it. Queen and rook line up on the f-file behind the bishop, and f7 has to hold everything. That file is what the gambit pawn paid for, and the pressure never really goes away.
Chapter 4: The Knight Guard
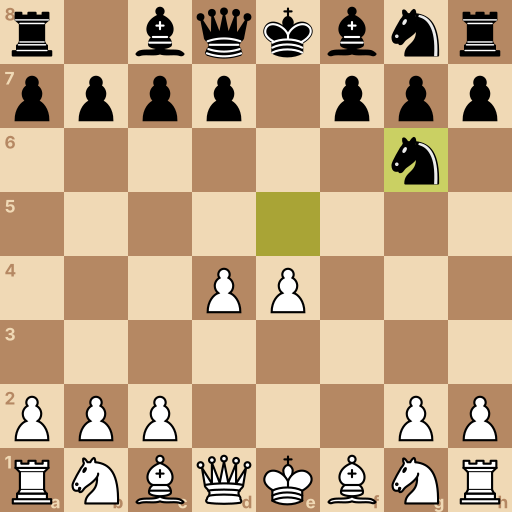
Main line: 1.e4 e5 2.f4 Nc6 3.fxe5 Nxe5 4.d4 Ng6
Position after 1.e4 e5 2.f4 Nc6 3.fxe5 Nxe5 4.d4 Ng6. White to move.
Sometimes they refuse to take and guard e5 with the knight instead. It looks sensible.
But a pawn guarded by a piece is a pawn you can still take — the piece can be kicked afterward, and the pawn cannot come back.
Your move: Take the e5 pawn with your f-pawn.
3.fxe5 Your f-pawn takes the pawn it has been attacking.
Your move: Their knight takes back — now kick it. Push your queen's pawn two squares, to d4: the knight must run, and the middle is all yours.
4.d4 The queen's pawn, two steps — it hits the knight and claims the middle in one go.
Question: The knight runs to the edge. What did their careful guard actually cost?
Answer: Time — their only developed piece ran home while you took the middle. Count who owns the middle squares now, and where their knight ended up. The pawns are even, but you own e4 and d4, your pieces come out with threats, and their knight spent three moves to reach the rim. Develop fast and castle — the middle is already yours.
Final challenge: The Grabber (800 Elo)
The opponent says: Free pawn? I'll take it. And I'm not giving it back.
Your tasks in the game, in order:
Shut the door on the queen check — knight to f3.
Point your bishop at f7 — out to c4.
Take the whole middle with d4.
Castle — your rook lands on the open f-file.
Position after 1.e4 e5 2.f4 exf4 3.Nf3 d6 4.Bc4 Be7 5.d4 Nf6 6.O-O. Black to move.
History of the King's Gambit
1.e4 e5 2.f4 defines the King's Gambit, classified under ECO C30 to C39; the name refers to White offering the kingside f-pawn after advancing the king pawn. The opening was recorded by the late sixteenth century and became a central attacking opening in nineteenth-century tournament and match play.
Main ideas for White
White uses 2.f4 to challenge e5, divert Black's central pawn, and open the f-file for a rook after castling kingside. A knight on f3 controls h4 and e5, a bishop on c4 points at f7, and the d-pawn builds a broad center. In accepted lines Black usually tries to hold f4 with 3...g5 or develops while pressuring e4; in declined lines Black supports e5 or returns pressure against White's center.
Typical plans
In accepted positions White normally builds pawns on e4 and d4, develops quickly, castles, and places queen and rook on the open f-file. The bishop on c4 and heavy pieces create pressure against f7 while White looks for d4 or g3 to break Black's pawn chain. Black seeks time to consolidate the extra pawn, challenge the center with a d5 break, or exchange attacking pieces.
Common mistakes
Developing 3.Bc4 before stopping the queen check allows 3...Qh4+, so play 3.Nf3 before arranging the bishop on c4.
Trying to regain the f4 pawn at once wastes development time; build the center, castle, and recover it when your pieces support the capture.
Attacking only on f7 while neglecting the center lets Black consolidate; advance the d-pawn and develop both knights before committing more pieces.
Related openings
Italian Game1.e4 e5 2.Nf3 Nc6 3.Bc4. Fast pieces, and a bishop aimed straight at f7.
Ruy Lopez1.e4 e5 2.Nf3 Nc6 3.Bb5. Lean on the one knight holding up their middle.
Vienna Game1.e4 e5 2.Nc3. Knight out first, f-pawn free to charge.
Scotch Game1.e4 e5 2.Nf3 Nc6 3.d4. Break the middle open on move three.
Caro-Kann Defense1.e4 c6. Answer 1.e4 with a middle pawn that arrives guarded.
French Defense1.e4 e6. One pawn guards, the next one strikes the middle.